|
So there I was, sitting in my hobby room waiting for some inspiration and suddenly it struck me! Why not use all those
leftover bricks from the Hirst Arts "Ruined Tower" mould to build a little ruin as a backdrop for my miniature photography??
This could also be a good, simple tutorial to put on our gaming group's website...
Required tools and accessories:
- Craft paint from Apple Barrel, Deco Art, Folkart or in my case, Delta Ceramcoat: Mudstone and Sandstone,
- Plaster to use with the mould (see Hirst tutorial), - A dark brown wash: I use a mixture of 50% water, 50% Future floor polish and some Delta Ceramcoat Walnut Brown,
- A cheap brush for drybrushing,
- A regular brush for painting,
- White glue (PVA): Aleene's Tacky Glue is very good,
- Tweezers,
- Rubble: small pieces of cork or plaster will do,
- Weathering powder, creeping vines and vine leaves (from Antenociti)
Step 1: Beginnings
Mix the plaster, pour into the mould, scrape carefully across the top of the mould removing the excess plaster, wait
30 minutes and remove the bricks from the mould.
Repeat until you have enough bricks for your project.
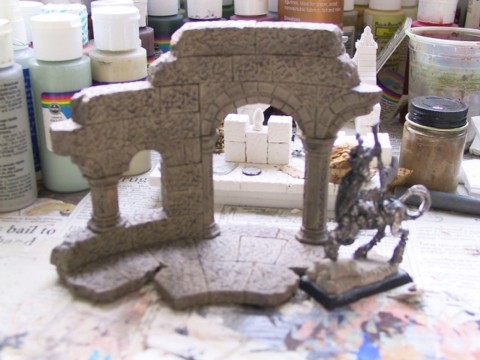
Step 2: Assembly
Take your bricks, sand where necessary with sandpaper (by the way, the floor tiles need not be too flat and even), and
assemble carefully row by row.
For straight walls it is important to use a flat surface as a guide, to keep things straight and level (items such as
stacked LEGO bricks are ideal).
For curved walls, I have no real solution: that is why I use White Glue (PVA) since mistakes are easily corrected before
the glue dries.
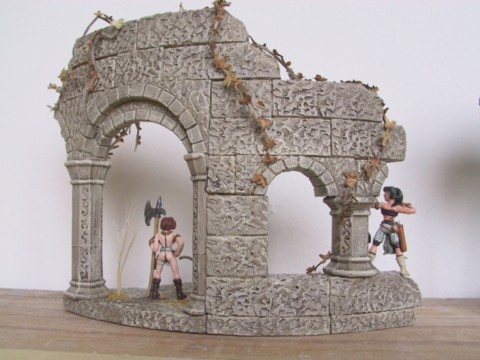
Step 3: Finished Ruin
Once fully assembled, the structure is painted with the base colour, Mudstone.
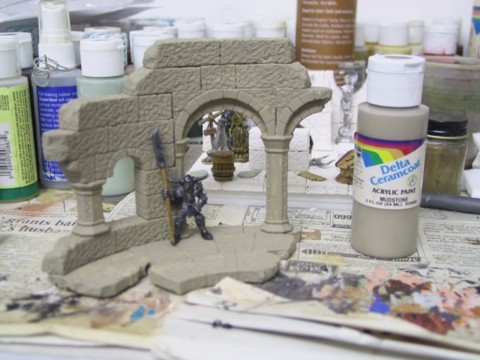
Step 4: More Painting
It is now time for the Dark Brown wash.
When it is dry, a little drybrushing of Sandstone with an old brush is required for better contrast and highlighting.
Step 5: Vines and Vine Leaves
Take some individual strands of vines and glue them to your ruin.
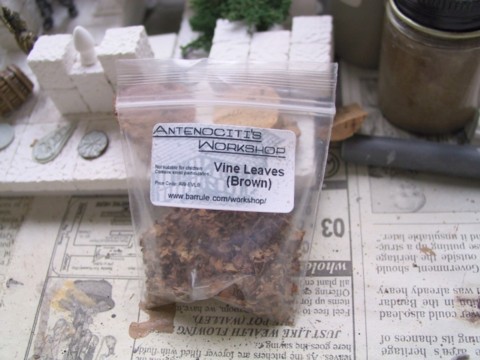
Step 6: Fixing the Vine Leaves
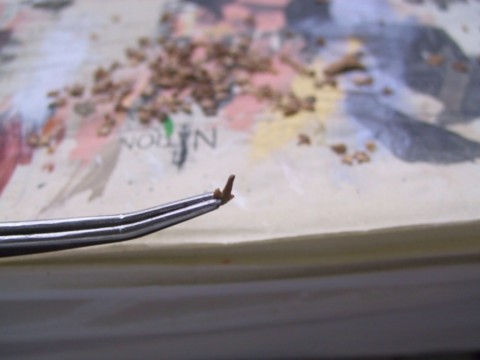
Here is the tricky part: try and catch whole individual leaves with your tweezers, add a drop of glue and place them
one-by-one onto the vines. It takes a while because you'll need a few dozen at least...
Step 7: Finishing Touches
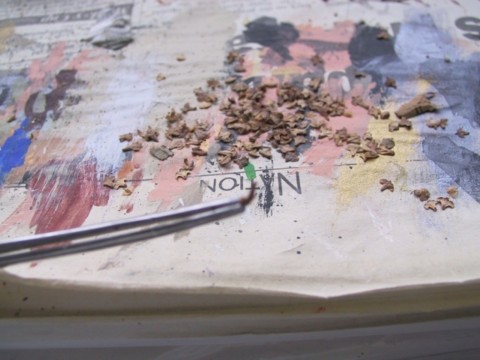
Add rubble: no ruin looks real without rubble. I used bits of cork from a wine bottle or leftover pieces of plaster placed
strategically on the floor and in cracks along the wall. Paint the rubble in the same colours as the rest of the structure.
Add some dirt: I use a secret recipe.............. OK, you've twisted my arm, I'll tell you........... ground cumin powder
from the kitchen cupboard on top of a few drops of glue.
Some more dirt (optional): weathering powder is extremely fine and is better applied with your wife's wide cosmetic brush
(one to apply rouge, I think, not sure....... honest!!!) since it behaves like dust. A little goes a long way... and
don't tell the missus you've used her brush..............
A touch of green and grass (optional): for colour photography another colour is essential, therefore it can be useful
to add some tiny pieces of litchen within the rubble; same with long grasses or reeds.
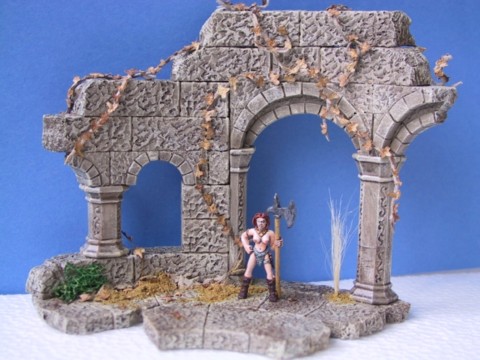
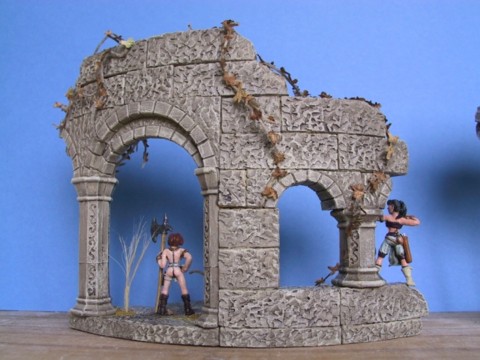
Step 8: Blue Background
My son had a piece of Blue paper that he didn't use: it was just lying around, so I took it as background. See the difference
between the two pictures below to see the effect:
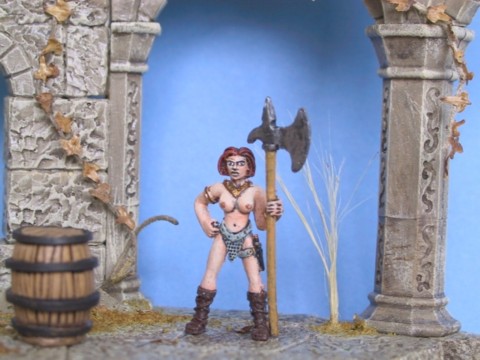
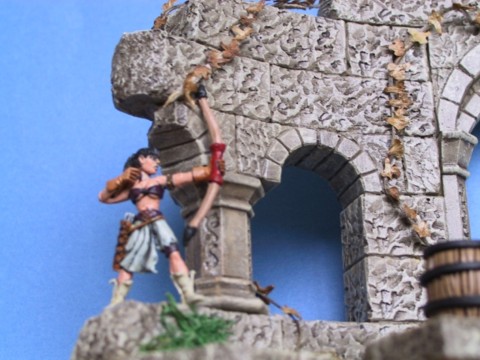
Step 9: Photo Time!
The following pictures show closer details with miniatures added.
Enjoy and cheers,
Yassine

|